


Hexie Pincushion Pedestal: A Makeover
Aug 2020
POSTED
TOPIC
TYPE
Today I have another fun project to share that cost me next to nothing, and makes use of your scraps and leftovers.I was in one of my favourite op (thrift) shop and saw this gorgeous little elephant pedestal, marked for only $3! It was one of those things that I immediately knew exactly what I wanted to do with it, right down to the colours and and trim...blue again of course, and I need to start working on a wider colour palette!Here's what it looked like originally, and of course all my kids told me they liked it the way it was, and was I really going to spray paint it white?? I replied that couldn't they see it was actually a hexie pedestal pincushion in disguise??

Of course there was absolutely nothing wrong with it at all...just not the style I was going for. I gave it two coats of rustoleum in white, and we were good to go.I measured the diameter of the bowl, and added about 1.5cm to allow for the 'puff' of the pincushion, and worked out the size of my hexagons, which ended up being 1 inch.I couldn't find the lace I wanted in colour or style, so I crocheted my own. Here's the first strip I made in the photo wound onto a cotton reel.
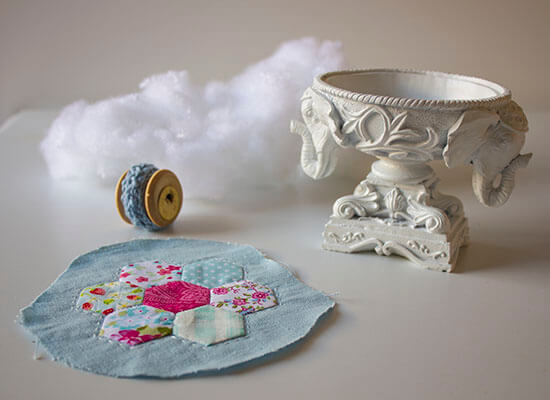
I was really disappointed in how chunky it turned out in the heavier weight cotton, so dug around a bit more and found I did have the exact colour I wanted in a lighter thread. Wow, what a difference. And the best part is this lace really is vintage, as the cotton came from my husband's paternal grandmother. I love putting something with this much history into a project!Here are the two weights contrasted, and the difference in gauge is quite striking. The one on the left is 4py (fingering weight) done on 3mm hook, and the lace on the right is crochet cotton done on 0.75mm hook. I always find it fascinating what changing the yarn and hook size can do.

And here it is all dainty, wound onto the same reel.

Here's an idea of how much polyfil I used. A common mistake is to understuff your projects, but they quickly lose their shape and look floppy. So don't be afraid to cram it in!


For the next step I whipped out my trusty glue gun, and attached the hexie top circle to the base. I glued mine at four quarter points of the circle to begin with, without adding any stuffing, just to make sure it was even. Then I poked the stuffing in gently, and eased the remaining edges down with little dabs of glue.

This was pretty fiddly, and I'll never enjoy working with hot glue. The little strands get all over you, and I can never control the amount that comes out very well. But overall, there were no major dramas. I glued the lace around the edge, and tucked the ends in.Then I decided to bead it with some vintage seed pearls. These come from my husband's maternal grandmother's bead collection, which I have not even touched the surface of! She was another formidable crafter!


So, another fun project using up scraps of what I had, and only costing me $3... I hope this helps inspire you to repurpose unusual items, and be thrifty. See what you can make a pincushion from...


Join my Facebook community

If you're a social bee, get involved with over 7,500 sewists, quilters, and creators from around the world. Share your creations and get inspired!

