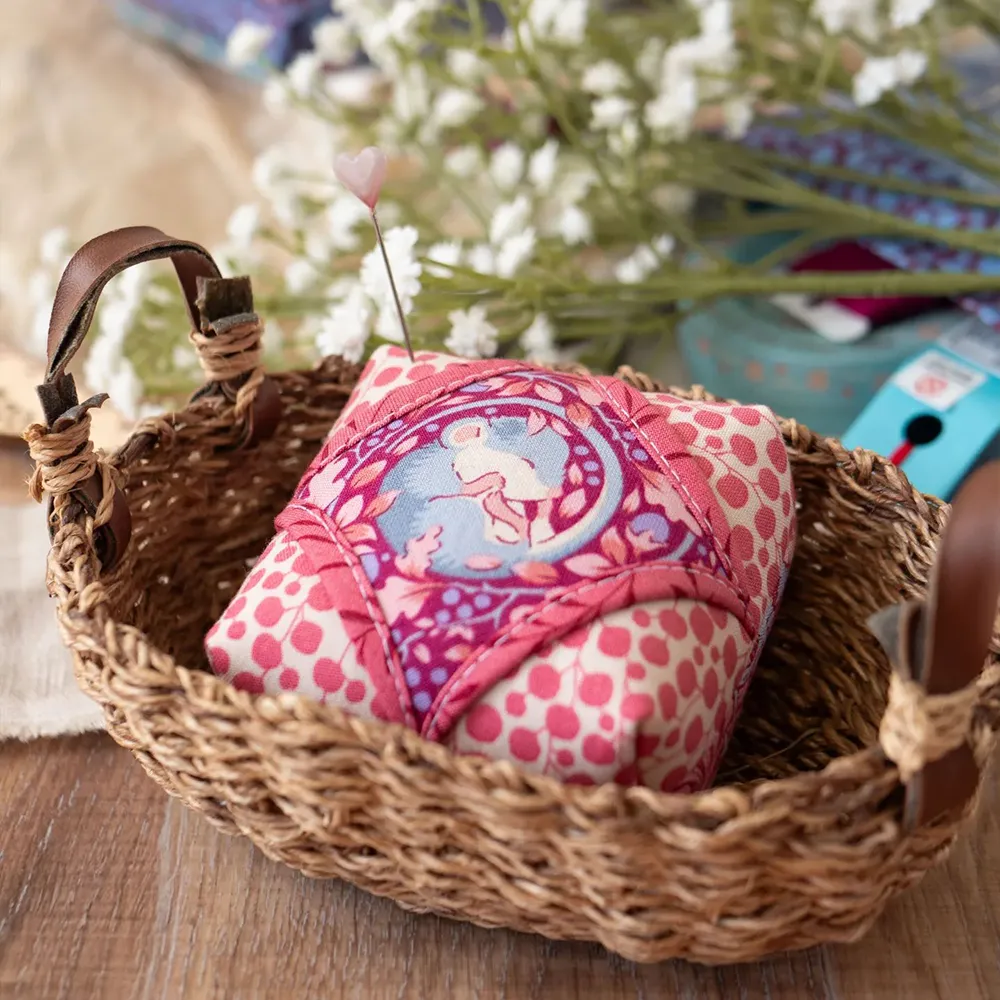
Make this whimsical pinnie and give micro hexies a whirl with my free downloadable templates
I've been following along with the #iLoveEPP2020 thanks to Leela of challenge on Instagram, and decided to try something new this week.
Micro hexies!
If you've ever thought it might be fun to try some babies like this, but didn't really want to commit to a large project, then this is the post for you!
I had a go at these a few days ago, and decided to draw my own templates in Illustrator.
Then I had a sudden idea...why do they have to just be a boring white...so I put something on the back to make me smile when I turn my work over.
Cute baby backsides! (I know I love a good cute behind!)...I hope you smile if you use these too!
I've written some basic instructions for you to make this:
To make this design as shown here, you need to download the free printables at the bottom of the post. Print out the size you want, cut out carefully (it's like kindy cutting practice all over again!)
Baste 31 hexies. I used my sewline glue pen to baste them, just very sparingly.
This is another project where using Liberty Tana lawn is greatly useful...the thinner fabric means much bulk in the seams.
I've fussy cut 7 of my hexies with some tiny Liberty characters.
Stitch together into hexie flowers.


After that I removed the papers carefully, and gave it another press to make sure the seam allowance on the outer hexies was laying flat.
Then I traced the piece roughly onto piece of fusible woven interfacing...my favourite product to reinforce Liberty and 'brighten' it. It also helps to hold all the seams flat.
Then roughly cut out the interfacing slightly smaller than your traced outline.
Fuse gently to the back of the work, making sure all the seam allowances are pressed under correctly.
To make the size pinnie shown here, I've used the 3/8" size hexies.
Cut out a 6" square piece of linen, and a 6" piece of fabric for the back. You can back these with batting too if you wish.
Baste the hexies with pins or glue onto the centre of the linen, and applique.
Sew right sides together, and include a lace edging if you wish.


This is a very special hand made tatted lace that my daughter-in-law gave me, and I only had enough to go around this part of the pinnie. When you have a challenge, improvise and make a feature out of it!


So if you'd love to give these a go, just download the image below, and you'll get a sheet of 3/8" hexies and 1/2" hexies to print on your home printer. Just make sure your settings are set to 'print at full size'.
I find that regular weight paper is ok for this when you use Liberty.
Heavier weight fabric would benefit with a thicker paper.

Enjoy!
Please tag me if you make a project with these using #microhexies.
Join my Facebook community

If you're a social bee, get involved with over 1100 sewists, quilters, and creators from around the world. Share your creations and get inspired!


