November Liberty Society
I've always dreamed of being let loose at the Liberty shop. What Liberty lover would turn down an opportunity like this?
So when Marti from Ava&Neve offered me the chance to curate the November Liberty Society, I couldn't go shopping fast enough!
Yes, it was only virtual shopping, but hey, I got to shop!!
To ensure a coherent bundle that works well together, Marti always works from a colour palette that limits your choices. Less choice is actually fantastic, as it can be mind boggling going through the massive range of fabrics at Liberty!
Here is November's Design Seeds that we worked from:

...and here's the fabrics I chose to fit the brief. I hope you love it as much as I do!

You can pick any three of these fabrics, and they just play so well together!
For photography purposes, I've just broken them into a warm palette and a cool one.
But as you can see, they can all cross over and be friends on both sides!


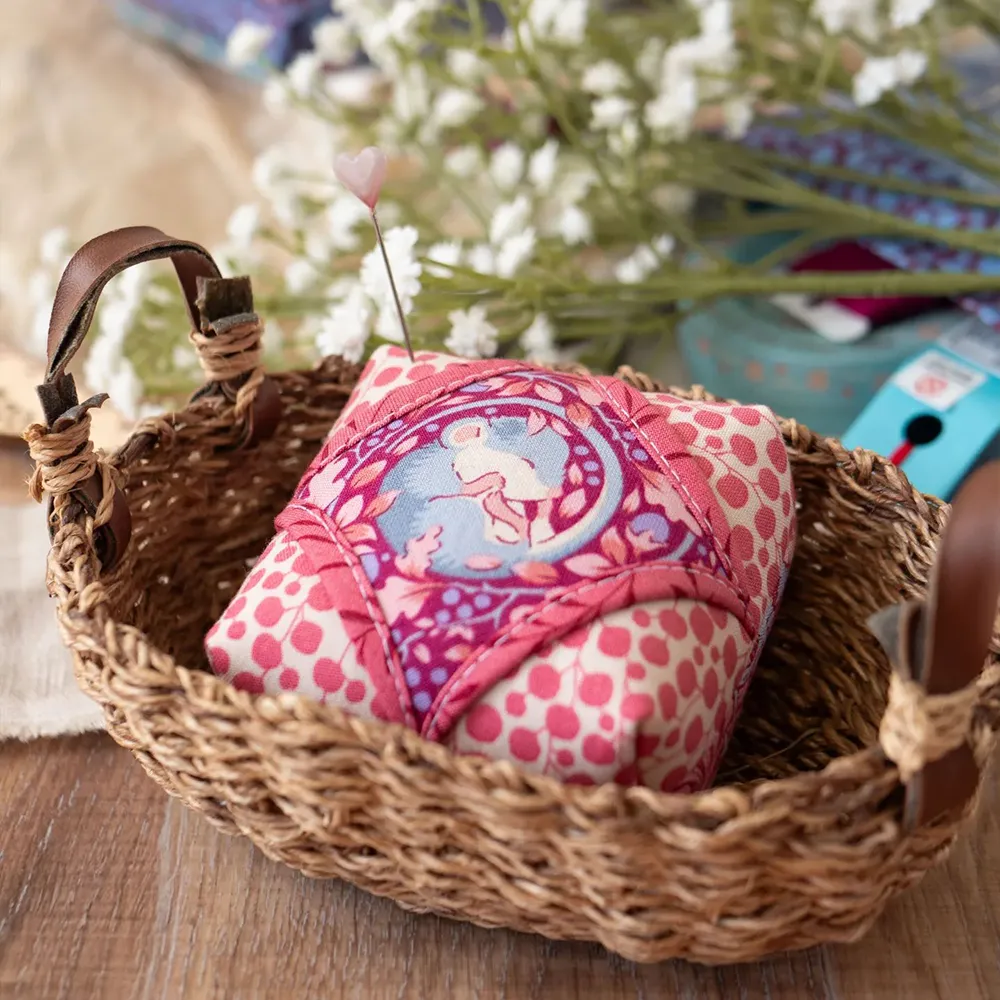
As a bonus with November's Society, we've included a special project, my Wildflower Pillbox Pinnie pattern, to help inspire you.
If you haven't seen this pattern before, it's a BIG pinnie, 5 1/2" across, with two rows of #epp clamshells around the sides.
It's a sweet mix of applique, english paper piecing and handquilting.
What I love most about this pinnie is that the hefty size means you can stuff it with pins with one hand and it stays put.
Because I fill the bottom half with rice, it's got a big presence of its own.
It's destined to become the workhorse of your sewing days.

I've made it up in November's fabrics, and given it a whole new look.
The edition arriving in your mailboxes has the exclusive cover only available through the Society, with a new take on the top of the pinnie.
You'll have the option of completing the pattern as per the instructions, or follow along with my new circles applique design.
This is really fun!

To complete the top shown here, you'll need some freezer paper, my circles template, or trace a 2.5", 2" and 1.5" circle.
I used one large circle, and three of each of the smaller ones, but play around with your own layout, and see what you like best.
Trace the circles onto freezer paper, then iron onto the wrong side of your chosen fabrics. Cut out with approx 1/4" seam allowance, and use the starch method to make a beautifully round circle outline.
I've found this is the best method for getting perfectly round circles, rather than just using needle turn.


Applique circles to the top, making sure the edges of the circles extend out beyond your traced large circle.
Trace more circles using the templates onto the top, varying the sizes and placement, and overlapping if you wish. Hand stitch these using perle 8 in coordinating colours.

Then cut out the large circular top, trimming off the outer edges of the appliqued circles.
You can then proceed with the rest of the pattern. I've also included a handy downloadable template for the 2" clamshells.

The piping adds a super tailored finish to this project, and if you find this a bit intimidating, stay tuned for a more in depth tutorial for making and adding it.
Below is the November Society Chip filled out for your records.

As always, I'd love to hear from you if you make this pattern! Hashtag #wildflowerpillboxpinnie on social media, so we can all see it!

Join my Facebook community

If you're a social bee, get involved with over 1100 sewists, quilters, and creators from around the world. Share your creations and get inspired!


