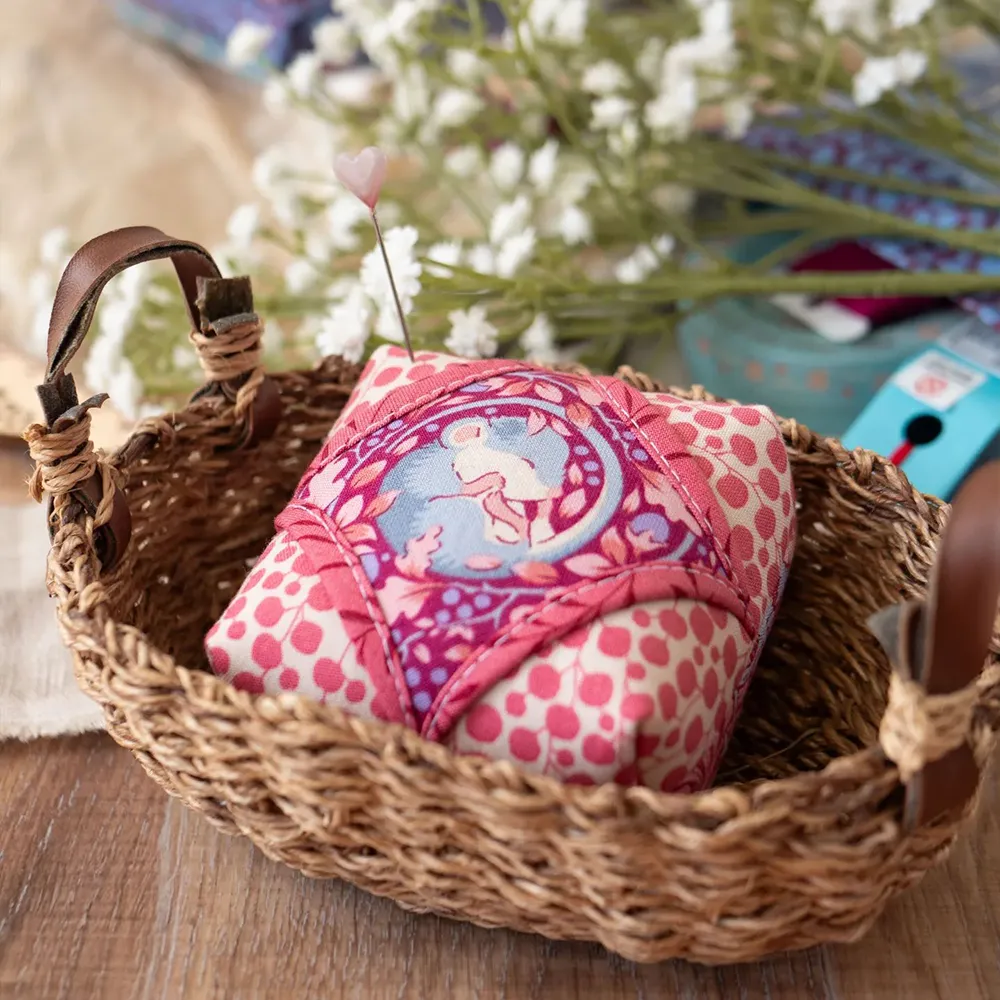
Diamond Cathedral Pincushion Tutorial
Make a pincushion workhorse for your sewing room using this easy cathedral window tutorial
I love to share a cute bit of sewing to brighten your day, and who couldn't enjoy the flash and bling of an easy cathedral window design?
If you've seen traditional cathedral window designs made, you might remember that they use a large amount of fabric that folds down to a much smaller size, and I've always felt it wastes quite a lot!
So when I stumbled across this way of making them the other day, I was very excited!
This uses small squares so it's great for using your scraps, and don't we all love a scrap buster!

As I played around, I discovered that you could vary the size of the diamond for an even more interesting effect, and so the Diamond Cathedral Pincushion was born!
I've used the Anne of Green Gables - Kindred Spirits fabric collection by Jill Howarth for Riley Blake, and it's simply the cutest choice for this project!
Let me just say that this is combines the satisfaction of scrap busting with the fanciness of a tricky looking design, but it's deceptively simple, which is a big win win.
This design has one large central diamond, flanked by two smaller ones. The effect is really interesting!
My tutorial assumes basic sewing knowledge, and an assortment of basic sewing supplies. Seams are 1/4" throughout.
So without further ado, lets get started!
Method:


1. Read to the end before beginning :)
2. Cut out all pieces.
3. Lay out out background fabric 1 squares right sides up.
Fold the 1 3/4" main contrast squares in half on the diagonal wrong sides together and press. Repeat with the 2" main contrast squares.
Place each folded main contrast square onto a background square, aligning raw edges to one corner. Repeat with larger contrast 1 squares.
If you're using a directional print, be sure to check alignment as pictures show. You may need to flip a square to get them to all face the same direction.
Stitch along raw edges on two sides with 1/8" seam allowance, so that all [12] squares have a folded square attached to them.

4. Take the [4] background 1 squares with the 2" main contrast squares sewn to them, and join [2] pairs right sides together. Now join both pairs together, right sides together.
Repeat with remaining two pairs of smaller main contrast squares, so you have one large diamond, and two smaller ones.
Place fussy cut large and small centres onto the diamonds, centering and tack down with fabric glue.

5. Turn back the folded overhanging edge of the square so that it covers the edge of the centre square on a diamond unit. As it's a bias edge it will roll over nicely.
You can pin this down if you wish. Stitch close to edge, stopping and pivoting at each corner. The corners are probably the most fiddly part, so a stiletto tool or small pair of scissors that can hold the corners in place can be useful. The folded edge will measure about 1/4" at the widest part.
Repeat with each diamond unit. You will have [2] small diamond units and [1] large one.


6. Sew the three diamond units together, right sides together.
Baste to a piece of batting, and quilt as desired. I stitched a straight diamond stitch between the points, but you could try a different curve, or even a touch of hand quilting.

6. Trim batting to fit fabric.
Prepare sides by stitching background fabric 2 and main contrast together, right sides together, for [2] short sides and [2] long sides.
Sew sides together into one continuous loop, alternating short sides and long sides.
Leave the last 1/4" of the top and bottom of each seam open, and backstitch each end to reinforce.
Add optional pompom trim to bottom edge.
This is a useful youtube tutorial for some hints on how to do this.

Attach sides to top, aligning the 1/4" openings and pinning into place.
Sew with a 1/4" seam allowance, pivoting at corners.


Add base to the sides, leaving a 2" turning opening.

7. Trim corners, and turn through to the right side, pushing corners out gently.

Stuff pincushion by pushing small pieces of stuffing in at a time and manipulating into the corners.
I also use a cup or so of rice for added weight.
You will need to stuff firmly for a nice plump finish.
Close up the opening with blind stitch.

8. Add a charm or decorative plate if you wish for added bit of cuteness!


Now wasn't that the easiest Cathedral Window design you've ever made??
It's just such a cute addition to your sewing notions, and would make the perfect gift for a sewing friend.
I'd love to see if you make one of these, so share your creations using #diamondcathedralpincushion.
Join my Facebook community

If you're a social bee, get involved with over 7,500 sewists, quilters, and creators from around the world. Share your creations and get inspired!


